
TL;DR
Moving your rig into a closet isn’t just about muffling noise. Strategic placement, layered soft materials, and ventilation turn a small space into a quiet, efficient studio. The key is balancing sound absorption with proper airflow to keep your machine cool.
Ever thought your noisy AI rig or vocal booth was doomed because of tiny space? Think again. The secret isn’t just in slapping foam on the walls—it’s about where you put your gear, how you treat the room, and making sure heat doesn’t turn your closet into a sauna.
In this guide, you’ll learn how to turn a closet into a quiet, functional workspace. From proper placement to DIY dampening tricks, you’ll discover practical ways to make your small space work for you, not against you.
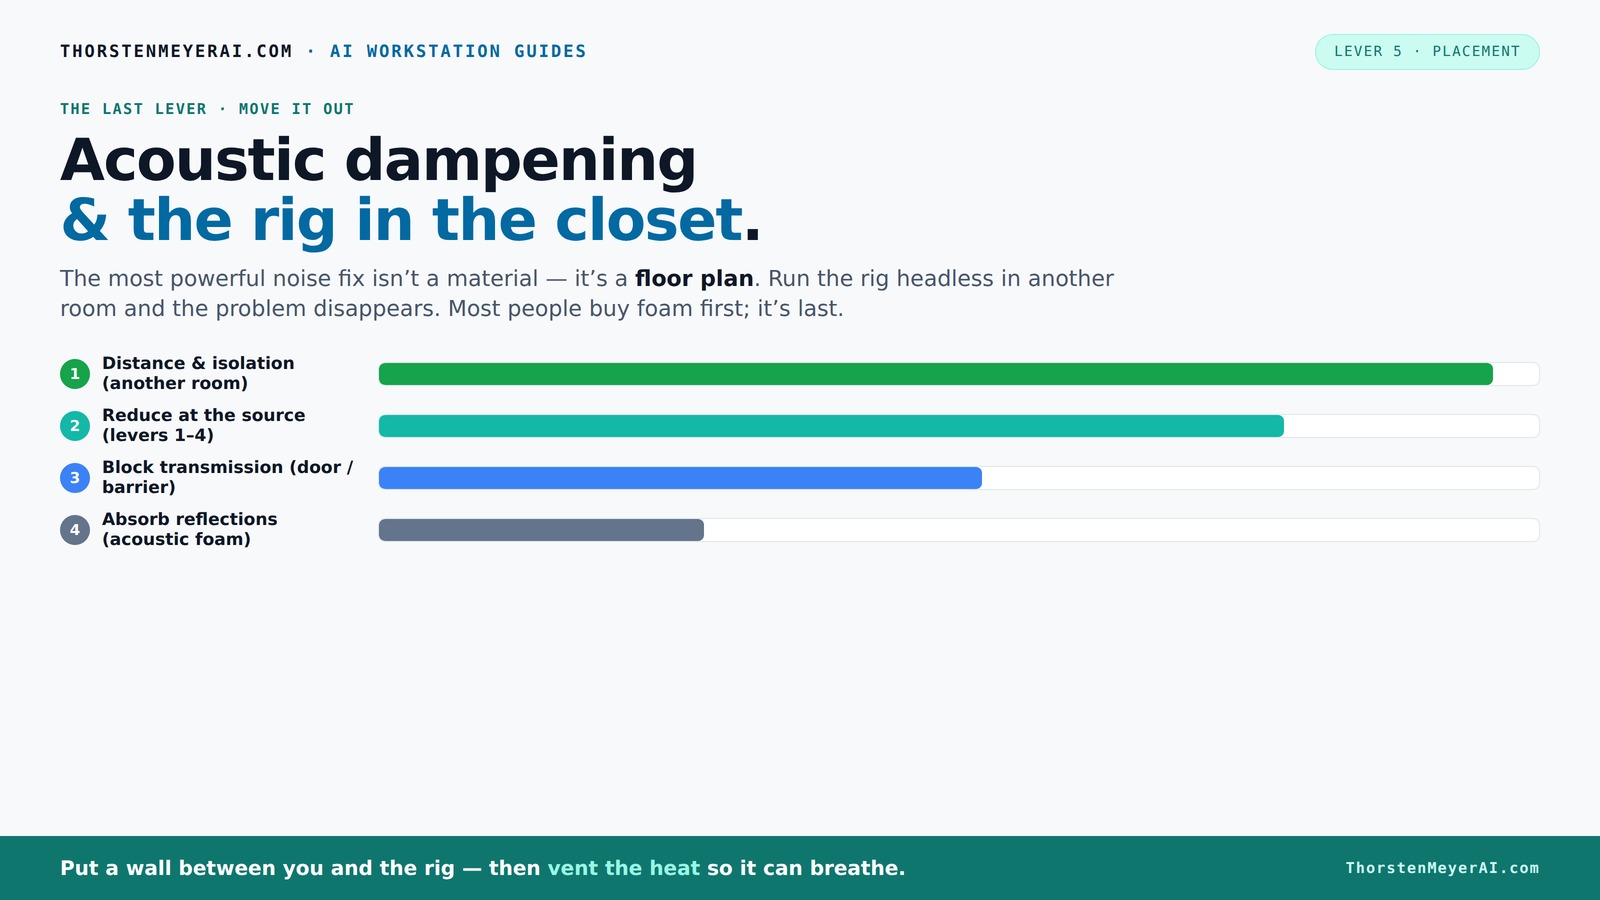
Acoustic dampening
& the rig in the closet.
The most powerful noise fix isn’t a material — it’s a floor plan. A rig you can’t hear because it’s in another room beats any amount of foam. Tap the approaches in Part 1 to see what actually works.
(another room)
(levers 1–4)
(door / barrier)
(acoustic foam)
Contain the noise, not the heat
Key Takeaways
- Focus on placement of soft materials at reflection points, not just covering corners with foam.
- Use layered soft materials like blankets, curtains, and rugs for DIY sound treatment.
- Seal gaps and cracks around doors and vents to prevent sound leaks.
- Ensure adequate ventilation—use fans or ducts—to keep your rig cool in a closet setup.
- A closet can be a perfect, quiet workspace if heat and soundproofing are managed thoughtfully.

24 Pack Black 12 x 12 x 2 Inches Pyramid Designed Acoustic Foam Panels, Sound Proof Foam Panels for Walls, High Density and Flame-Retardant Acoustic Panels, Sound Panels for Recording and Home Studio
Exceptional Sound Absorption:These pyramid acoustic panels are engineered to effectively absorb sound waves, reducing echo and reverberation. With...
As an affiliate, we earn on qualifying purchases.
As an affiliate, we earn on qualifying purchases.
Why Soundproofing Isn’t Just About Foam — It’s About Placement and Materials
Many people assume acoustic foam alone will silence their rig. But the truth? Foam mainly absorbs echo and reflections, it doesn’t block sound from leaking out or in. Think of foam like softening a drum’s echo—it doesn’t stop the drum’s bang from being heard elsewhere.
Instead, focus on where the sound is traveling. Place absorption panels at key reflection points—like behind the mic or near hard surfaces—where sound bounces. Use soft materials like blankets or rugs on walls and floors to tame the room’s natural echo.
For example, a voice-over artist layered blankets on walls and a thick curtain over the door. The result? A dry, clear vocal sound without needing to seal every crack.

Portable Recording Booth for Home Studio, Foldable Sound Isolation Vocal Shield with Floor Stand, High-Density Acoustic Blanket Enclosure for Singing, Voiceover & Podcast, Includes Phone Holder
INSTANT STUDIO-QUALITY "DRY" SOUND: Transform any noisy room into a professional vocal booth instantly. Engineered with high-density acoustic...
As an affiliate, we earn on qualifying purchases.
As an affiliate, we earn on qualifying purchases.
Where to Place Acoustic Treatment for the Best Closet Sound
Proper placement of soft materials makes all the difference. Start with the main reflection points—behind the microphone, and on the ceiling. Then, target the door and walls that face your sound source.
Use a mirror trick: hold a mirror against the wall and see where your reflection of the mic or speaker appears. That’s where sound bounces back—perfect spots for foam or blankets.
In a small closet, overlapping foam near the door, on shelves, and around reflective surfaces helps cut harsh echoes. Don’t forget the floor—adding a rug or blanket reduces reflection bouncing off the hard surface.
For example, a YouTuber placed foam panels at the main reflection points and laid a thick rug on the closet floor. The difference in clarity was night and day.
Kingwin 120mm Silent Fan for PC Cases, CPU Coolers, Mining Rigs – Quiet Computer Cooling Fan with Long Life Sleeve Bearing, High Airflow Ventilation – Black CF-012LB
special high profile fan blades for maximum air flow
As an affiliate, we earn on qualifying purchases.
As an affiliate, we earn on qualifying purchases.
The Hidden Challenge: Bass Buildup and Low-End Resonance
Small closets tend to amplify low frequencies, creating a muddy, boomy sound. This is because parallel walls and tight spaces cause standing waves, especially at bass frequencies.
To combat this, add bass traps in the upper corners or at the base of walls. These are thick panels—usually 4 inches—that absorb low-end energy and prevent it from bouncing around.
In a recent DIY build, a creator added bass traps in the closet’s upper corners and used thick blankets on the walls. The low-frequency muddiness disappeared, and vocals sounded cleaner.
Remember: thicker, denser materials absorb lower frequencies better. If you notice muddiness, it’s time to treat the bass.

20 Pieces Sound Absorbing Interlocking Floor Mats, 11.8 x 11.8 x 0.4 inches High Density Felt Soundproof Pads Non-Slip Anti Vibration Puzzle Acoustic Blankets Piano Carpet Drum Rug, Black
✔Interlocking Floor Mat Set with 20 Puzzle Pieces: Package includes 20 pcs interlocking mats, each mat measuring 11.8"...
As an affiliate, we earn on qualifying purchases.
As an affiliate, we earn on qualifying purchases.
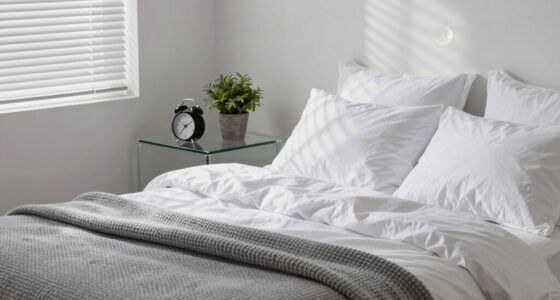
DIY Soft Materials That Make Your Closet Sound Better
Cheap, easy, and effective—DIY materials are your best friends here. Use moving blankets, old curtains, rugs, and foam panels. Layering soft fabrics inside the closet can drown out harsh reflections and create a more natural sound environment.
For instance, hanging blankets on walls, draping a curtain over the door, and laying a rug on the floor can significantly reduce echo. Shelves filled with soft fabric or foam block sound bouncing off hard surfaces.
One popular setup involves lining walls with blankets, placing a thick rug on the floor, and covering the door with a quilt. It’s fast, adjustable, and cheap, plus it works.
Sealing Gaps and Openings — Don’t Let Sound Leak Out
Gaps around the door and vents are silent gateways for sound leaks. Seal cracks with weatherstripping or acoustic sealant. Even small gaps beneath the door can let noise escape or unwanted sound seep in.
For example, a creator added weatherstripping around the closet door and used foam tape along the edges. The room’s soundproofing shot up, and the rig’s noise stayed inside.
Remember, a tight seal complements your soft materials—together, they make your closet much quieter.
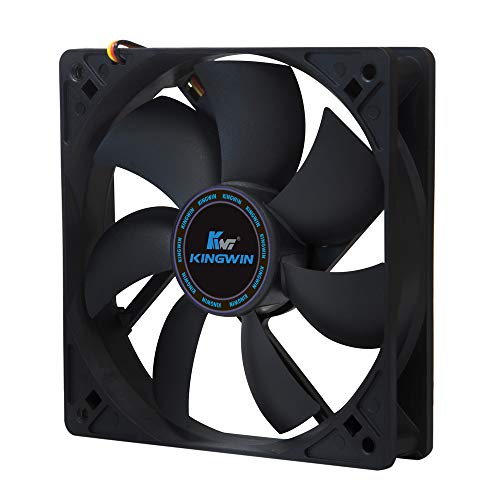
Keep Your Rig Cool and Quiet — Ventilation Tips for Closet Rigs
Placing a hot, powerful machine in a sealed closet is a recipe for overheating. The solution? Good airflow. Use passive vents, or better, a quiet exhaust fan to pull hot air out and bring in cooler air.
In a recent project, a builder installed a small vent and a quiet 120mm fan. The machine stayed cool, and noise levels dropped because fans weren’t working overtime to fight heat.
For full control, consider a temperature-controlled exhaust system or a soundproof cabinet with ducted airflow. Proper ventilation keeps your rig happy and your closet quiet.
Learn more about cooling options in [this guide](https://thorstenmeyerai.com/reduce-heat-noise-ai-workstation/).
A 'Rig in the Closet' — Is It Really a Good Idea?
Using a closet as a workspace can be brilliant—if you handle heat and airflow properly. The main advantage? You're removing the noise problem entirely. Your rig roars in the closet, while your workspace stays silent.
But the catch? Trapped heat can turn your closet into a hotbox. To avoid this, add ventilation, use a thermostat-controlled fan, and consider liquid cooling options that export heat outside.
For example, a streamer built a custom closet booth with ducted airflow and a small exhaust fan. The rig stayed cool enough for 24/7 use, and the noise reduction was remarkable.
Check out [this article](https://thorstenmeyerai.com/reduce-heat-noise-ai-workstation/) for detailed cooling strategies.
Frequently Asked Questions
What’s the difference between acoustic dampening and soundproofing?
Acoustic dampening reduces echoes and reflections inside a room, making sounds clearer and less harsh. Soundproofing blocks sound from escaping or entering a space. In small closets, dampening is more practical—full soundproofing is hard and often unnecessary.
Where should I place foam or blankets in my closet studio?
Start with the main reflection points—behind the mic, ceiling, and walls facing your voice. Cover hard surfaces like the door or shelves that reflect sound. Use the mirror trick to identify where sound bounces back and treat those spots first.
Do I need bass traps in a closet?
If your recordings sound muddy or boomy, bass traps help. Place them in upper corners or along parallel walls. In very small closets, thick panels or soft materials might suffice, but bass traps can really tame low-end issues.
How thick should acoustic panels be?
In small spaces, 2-inch panels often work well. Larger or more problematic rooms benefit from 4-inch panels for broader absorption. Thicker panels absorb lower frequencies more effectively, which is crucial in tight, reflective spaces.
Can I use a closet as a vocal booth without building a full studio?
Absolutely. With proper placement, layered soft materials, and ventilation, a closet can become a surprisingly good vocal booth. It’s a cost-effective solution that, when done right, produces professional-sounding recordings.
Conclusion
Turning a closet into a quiet, effective workspace isn’t magic—it’s about thoughtful placement and airflow. A well-treated closet rig can be as good as a dedicated studio, without the expense or construction.
Remember: the best soundproofing is removing the source, then controlling reflections and heat. When you master those, your closet becomes a surprisingly powerful tool—not a noise nuisance.
So, next time you think about your noisy setup, ask yourself: where can I put it? How can I keep it cool? The answers might just surprise you.